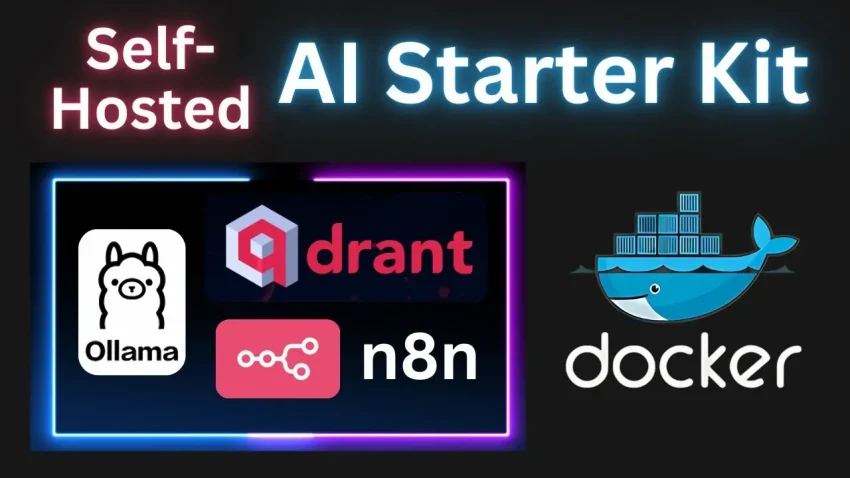
Qdrant Local Setup: A Quickstart Guide for Beginners
If you’re looking to leverage powerful vector search capabilities, setting up Qdrant locally is an excellent starting point. With a straightforward Qdrant Docker tutorial, you can quickly get your environment up and running, allowing you to dive into tasks like Qdrant collection creation and Qdrant client initialization. This hands-on setup will empower you to experiment with various features, including a vector search example that showcases how to effectively query your data. By mastering the basics of Qdrant, you’ll also gain insights into advanced functionalities like Qdrant query filtering, enabling you to refine search results to meet your specific use cases. Start your journey with Qdrant today and unlock the potential of your data-driven applications!
Embarking on a journey with Qdrant’s local setup opens up a realm of possibilities for developers and data scientists alike. This configuration typically involves utilizing Docker to create a seamless environment where vector storage and retrieval become manageable tasks. The process involves initializing a client that interacts directly with your collections, providing a solid foundation for various data operations. Mastering Qdrant also implies understanding how to perform efficient searches and enhance results through advanced filtering techniques. By engaging with Qdrant, you can harness the power of vector databases to build innovative applications that leverage complex datasets.
Getting Started with Qdrant Local Setup
Setting up Qdrant locally is a straightforward process that begins with downloading the latest Docker image. By executing the command `docker pull qdrant/qdrant`, you will retrieve the essential files needed to run your Qdrant instance. Following the download, launching the service is equally simple with the command `docker run -p 6333:6333 -p 6334:6334 …`. This enables access to key features like the REST API and the Web UI, located at `localhost:6333` and `localhost:6333/dashboard`, respectively.
When performing a local setup, it is crucial to ensure Docker is correctly configured to manage data storage, especially on Windows systems. By adhering to the usage of named volumes or storage directories like `./qdrant_storage`, you maintain consistency across your development environment and allow for easy data persistence. With your local Qdrant setup complete, you can seamlessly explore its functionalities, including client initialization and vector data management.
Qdrant Client Initialization Steps
Once your Qdrant instance is up and running, the next step is to initialize the Qdrant client. This can be done easily via various programming languages such as Python, Typescript, Rust, or even Java. For example, using Python, simply import the Qdrant client package and create a new client instance by referencing your local Qdrant URL: `client = QdrantClient(url=”http://localhost:6333″)`. Each language has its unique syntax, but the concept remains the same, allowing developers to interact with the Qdrant instance effortlessly.
Initializations can often make or break the user experience when working with databases. Therefore, ensuring that you’ve set the correct parameters during the client setup phase is essential for smooth operations later on. For instance, choosing the right port for GRPC API initialization (i.e. using port 6334) can enhance performance and accessibility, affecting how your application interacts with the stored vector data.
Creating a Qdrant Collection
Creating a collection in Qdrant is an essential step for storing your vector data efficiently. Utilizing the appropriate client method enables you to define the collection name and the parameters for storage, such as the vector size and distance metric used in calculations. For instance, you might create a collection named `test_collection` to handle data using the dot product distance metric by running the command: `client.create_collection(…)`. This foundational element is crucial for any vector search operations you intend to perform.
This process of collection creation not only establishes a structured format for your data but also optimizes how queries and searches operate as you work with larger datasets. Each collection serves as a container for different types of vectors and payloads, ultimately leading to more organized and efficient data management within your Qdrant environment.
Uploading Vectors with Payloads to Qdrant
Once a collection is created, the next step involves loading vectors along with their associated payloads into the Qdrant database. Each vector can be thought of as a mathematical representation of data points, with payloads providing contextual information about these points. For example, one can upsert vectors alongside their city identifiers in a single batch operation which simplifies data handling and enhances performance during searches.
The structure of these vectors is essential, as they need to adhere to the size and formatting requirements specified during collection creation. Through efficient vector uploads, you enable Qdrant to store and retrieve relevant data, making it easier to perform complex queries and searches that rely on both the vector’s value and its payload-associated information.
Executing Vector Search Queries
After your vectors have been successfully loaded into the collection, you can begin conducting vector searches. Utilizing the query method provided by the Qdrant client allows for an efficient search that retrieves vectors most similar to a given query vector. For instance, by using a simple search query like `[0.2, 0.1, 0.9, 0.7]`, you can identify which vectors in your collection exhibit the highest similarity, which is particularly useful for applications involving recommendations or information retrieval.
Implementing effective search queries is pivotal for obtaining accurate results, as the nature of vector searching leverages mathematical similarity measurements. Hence, fine-tuning your search parameters, such as the limit on the number of results returned, can greatly enhance usability and relevance in returned results. This is integral for developing applications that meet specific user needs through efficient data retrieval.
Filtering Query Results in Qdrant
In addition to executing basic search queries, Qdrant provides powerful filtering capabilities to narrow down search results based on payload attributes. By utilizing query filters, you can specify conditions that must be met for results to be considered valid. For instance, if you wish to find vectors associated with the city of London, you can incorporate a filter alongside your search, making it highly targeted and relevant.
This feature not only enhances the precision of search results but also ensures that you can cater to specific criteria important for your application. By combining vector queries with filtering strategies, you create a robust method for information retrieval that enhances user experience while ensuring data integrity and relevance.
Advanced Examples and Use Cases
As you become familiar with the local setup of Qdrant and its foundational operations, exploring more advanced use cases and examples can offer deeper insights into the versatility of the platform. From building sophisticated recommendation systems to implementing dynamic search functionalities across diverse data sets, Qdrant proves to be an invaluable tool for developers and data scientists aiming to leverage vector search technology.
Additionally, Qdrant’s seamless integration with various programming languages facilitates diverse applications, further enhancing its accessibility for users from different backgrounds. The ability to conduct high-dimensional vector searches and manage robust databases opens up numerous possibilities for innovation and research across various fields.
Utilizing Qdrant Cloud for Scalability
While a local setup offers a great way to familiarize yourself with Qdrant, transitioning to Qdrant Cloud can significantly enhance your project’s scalability and performance. By creating an account on Qdrant Cloud, you access managed infrastructure that allows for seamless scaling as your data needs grow. This eliminates the complexities of maintaining physical servers and ensures that your application remains responsive and efficient.
Moreover, Qdrant Cloud provides built-in features such as access control and enhanced security options, allowing you to focus on developing your application rather than worrying about the underlying infrastructure. With straightforward migration paths, moving from a local to a cloud environment enables users to optimize their operations effortlessly, paving the way for larger, more complex implementations.
Getting Community Support and Tutorials
As you work with Qdrant, engaging with the community and exploring available tutorials can provide you with a wealth of information that can accelerate your learning process. The Qdrant documentation is rich with examples, guiding you through various functionalities such as collection management and vector manipulation. Moreover, community forums often have discussions that can provide additional insights or workarounds for common issues.
Participating in community events or contributing to forums can enrich your understanding and may lead to discovering innovative ways to utilize Qdrant in your projects. The collective knowledge of the user community serves as an excellent resource for troubleshooting and gaining new perspectives on vector search and database management.
Frequently Asked Questions
What is the Qdrant local setup and how do I begin the Qdrant Docker tutorial?
The Qdrant local setup allows you to run Qdrant on your machine using Docker. To begin the Qdrant Docker tutorial, first pull the latest Qdrant image from Dockerhub with `docker pull qdrant/qdrant` and then run the service using `docker run -p 6333:6333 -p 6334:6334 -v $(pwd)/qdrant_storage:/qdrant/storage:z qdrant/qdrant`. This will set up Qdrant locally and you can access it via its REST API at `localhost:6333`.
How do I initialize the Qdrant client after setting up Qdrant locally?
After Qdrant local setup, you can initialize the Qdrant client using various programming languages. For Python, use `from qdrant_client import QdrantClient` followed by `client = QdrantClient(url=’http://localhost:6333′)`. This setup enables you to interact with your local Qdrant instance effectively.
What are the steps to create a collection in Qdrant during local setup?
To create a collection in Qdrant after the local setup, you’ll use the client. For example, in Python, call `client.create_collection(collection_name=’test_collection’, vectors_config=VectorParams(size=4, distance=Distance.DOT))`. This action establishes a new collection named ‘test_collection’ to store your vector data.
Can you provide an example of vector search after the Qdrant local setup?
Yes! After your Qdrant local setup, an example of a vector search is as follows: `search_result = client.query_points(collection_name=’test_collection’, query=[0.2, 0.1, 0.9, 0.7], with_payload=False, limit=3).points`. This will give you the top 3 vectors similar to your query.
How can I implement query filtering in Qdrant after local installation?
To implement query filtering in Qdrant after your local installation, you can use a filter in your query. For instance, in Python you might write: `search_result = client.query_points(collection_name=’test_collection’, query=[0.2, 0.1, 0.9, 0.7], query_filter=Filter(must=[FieldCondition(key=’city’, match=MatchValue(value=’London’))]), with_payload=True, limit=3).points`. This filters results to only those points that match the specified payload.
What security measures should I consider for my Qdrant local setup?
In a Qdrant local setup, security is essential as the default settings allow unrestricted access. Consider implementing encryption and authentication measures by exploring Qdrant’s security documentation to protect your data and instances, especially if accessed from networked machines.
| Step | Description |
|---|---|
| Download Qdrant | Run the command `docker pull qdrant/qdrant` to download the latest container. |
| Run Qdrant Service | Use `docker run` to start the Qdrant service and set up the necessary ports and storage. |
| Initialize Client | Set up the Qdrant client using your preferred programming language. |
| Create Collection | Create a collection named `test_collection` to store vector data. |
| Add Vectors | Insert vectors with payload data into the created collection. |
| Run a Query | Execute a search query to find similar vectors based on a query vector. |
| Add a Filter | Filter search results based on specific payload conditions. |
| Next Steps | Follow tutorials for advanced usage and Qdrant Cloud setup. |
Summary
Qdrant local setup is a straightforward process that allows developers to quickly begin utilizing this powerful vector search engine. By following the steps outlined, such as downloading the Qdrant Docker image, running the service, and initializing the client in various programming languages, users can effectively create collections, insert vectors, and execute queries. This enables organizations to leverage Qdrant for scalable vector searches in their applications.
#TechTutorial #QdrantSetup #VectorDatabase #AIInfrastructure #BeginnerGuide


